Product photographyMay 24, 2021Updated September 30, 202612 min read
How to photograph models: the complete guide
Learn how to photograph models step by step: planning, posing, lighting, equipment, and post-production, for lookbook and e-commerce shoots.
Table of contents
Model photography is the process of shooting people wearing or using a product for a lookbook, a campaign, or an e-commerce listing. It combines the technical side of product photography - lighting, equipment, and post-production - with the human side of directing a person rather than a static object. This guide covers both.
Key takeaways
Plan the shot list and the session's purpose (lookbook vs. product-focused) before the model arrives.
Be direct with specific, repeatable language ("chin down," "weight on your back foot") instead of vague instructions.
Use a 45-degree key light with a fill light or reflector to control shadows, and match your background to the mood you need.
A 50mm lens at a comfortable working distance keeps proportions natural; higher f-stops keep clothing detail sharp.
Shoot with post-production in mind: correct wrinkles, labels, and exposure in-camera to save editing time later.
Automated studios like Orbitvu's Fashion Studio can capture 150+ products a day with one operator, cutting a multi-week shoot down to days.
See your future studio in action
Show us what you sell, and we'll show you exactly how to capture it - packshots, video, and product data, captured live from your sample.
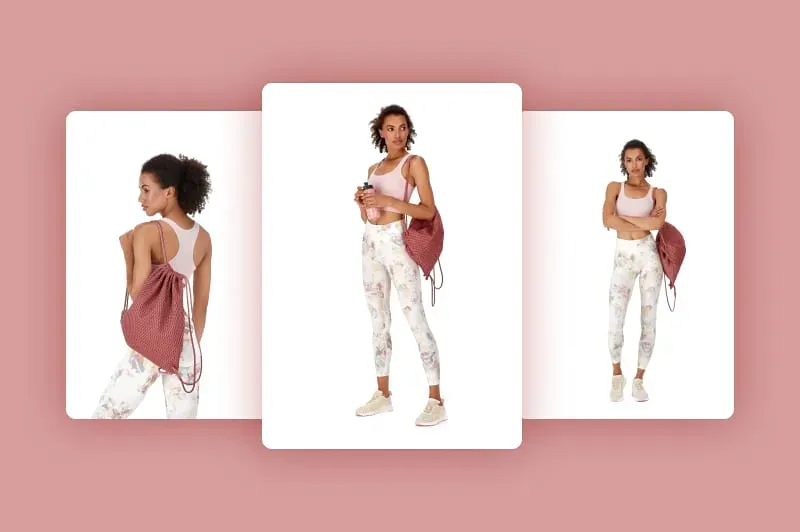
Model photography is any shoot where a live person wears, holds, or demonstrates a product for the camera, as opposed to still product photography, where the product is shot alone. Brands use it for two main purposes: lookbook photography, which sells a mood, a season, or a collection, and product-focused model photography, which shows how a garment or accessory fits, moves, and looks in use, usually for an e-commerce product page.
💡 If you're building the rest of your shoot around it, our guide to website product photography covers the parts of the workflow that sit outside the model session itself.
How do you prepare for a model photography session?
Preparation determines more of the outcome than anything you do on the day. Before the shoot, answer four questions:
What is the session's focus? A lookbook session prioritizes mood and storytelling; a product-focused session prioritizes construction, fit, and detail.
What shots do you need? Build a shot list tied to your marketing or PR goals, not a general "get some good photos" brief.
What is the sequence? Storyboard the order of looks, locations, and setups so hair, makeup, and lighting changes don't create dead time.
What could go wrong? Plan for a missing prop, a late model, or a location falling through, so the session doesn't stall.
What are the main types of model photography?
Type
Purpose
Typical setup
Lookbook photography
Showcases a collection, season, or brand mood through styling and setting
Location or styled studio shoot, creative backgrounds, editorial posing
Product-focused model photography
Shows garment construction, fit, pocket placement, and material texture for e-commerce
Plain or white backdrop (commonly RGB 255,255,255 for marketplace compliance), consistent lighting, repeatable poses
Lookbook shoots tend to cost more per image because of location logistics and styling; product-focused shoots are built for volume and consistency, which is why e-commerce and fashion brands increasingly automate them.
How do you find and work with models?
Finding a model. Depending on budget and scale, brands source models through agencies, modeling platforms, social media, or an in-house casting call. Whichever route you choose, review the candidate's portfolio for consistency of expression and movement, not just still poses, and confirm usage rights and session length in writing before the shoot.
Working with a model on set comes down to four habits:
Fix problems immediately. A loose label, a wrinkled sleeve, or a misplaced accessory should be corrected the moment you spot it. It's faster than reshooting and it signals that you run a professional set.
Build rapport early. A warm welcome, a clear explanation of what the session involves, and confident, measured direction all help a model relax, and a relaxed model photographs better.
Plan for comfort. Provide a meal for sessions longer than four hours, and keep water, shade, and breaks available throughout, especially outdoors.
Give direction the model can actually follow. "Turn left" means different things to you and the model facing you. Agree on consistent, specific cues instead, for example "chin toward your left shoulder" or "weight on your back foot," and demonstrate the pose yourself or show a reference image when words aren't enough.
What are the best poses for model photography?
Posing is where most new model photographers lose time, and it's also one of the more common gaps in generic photography advice: a pose that works for a lookbook can look stiff on a product page, and vice versa. Use these as a starting set and adjust for the garment or product you're shooting.
Pose
Best for
Direction cue
Classic standing pose
Clean product-focused shots, e-commerce
"Feet shoulder-width apart, weight on your back leg, shoulders relaxed."
Hip pop / S-curve
Lookbook and dresses, adds a natural line to the body
"Shift your weight onto one hip and let your shoulders angle the other way."
Three-quarter lean
Outerwear, tailoring, showing the garment's drape
"Lean your shoulder against the wall or prop, keep your weight forward."
Over-the-shoulder glance
Editorial and back-detail shots
"Turn your body away from camera, then look back over your shoulder."
Hand-to-face or hand-in-pocket
Accessories, jewelry, structured jackets
"Rest your hand lightly near your jaw" or "hook your thumb in the pocket."
Movement or walking shot
Lookbook, showing how fabric moves
"Walk toward me naturally, I'll call out when to pause."
Direct the model to hold a still, relaxed position while you shoot the detail alone.
Photograph each pose from more than one angle before moving on. It costs seconds on set and can save an entire reshoot in post-production.
How do you light a model photography shoot?
Your light source dictates most of the mood and the retouching workload that follows.
Light source
How it behaves
Best for
Daylight
Free and flattering, but changes throughout the day and with the weather
Lookbook shoots with a natural, editorial feel
Flash (strobe)
Freezes motion, consistent output, requires more technical control
High-volume, repeatable shoots and fast-moving poses
Continuous light
Visible in real time before you shoot, easier to preview the final look
Beginners, video, and slower shutter speeds
Working with daylight: shoot away from direct, overhead sun to avoid harsh shadows and color shifts, and use a diffuser to soften the light falling on the model. If the model is standing in shade, add a reflector to bounce light back in and avoid a flat, underlit look.
Working with flash: if you're mixing flash with daylight, a neutral-density grey filter keeps the ambient exposure under control. Background choice also changes what the light needs to do: a black background emphasizes backlighting and contrast, while a white background keeps attention on the product. Most cameras cap flash sync at 1/250s without high-speed sync (HSS), so plan your shutter speed accordingly.
Working with continuous light: because the output is visible before you shoot, continuous light is the easiest option for confirming a look in real time, particularly useful when you're directing a model into an unfamiliar pose.
Distance to the model matters more than focal length alone
A 50mm lens gives a natural perspective at a comfortable working distance. Longer focal lengths require you to shoot from farther back to avoid distorting the model's proportions.
Aperture depends on the goal
Use a higher f-stop (smaller aperture) for product-focused shoots, where you need the garment's construction and texture in sharp focus throughout the frame. Use a lower f-stop for lookbook shoots, where a blurred background adds depth and a more editorial feel.
Camera type depends on output
Full-frame sensors deliver higher resolution, useful for large-format print and campaign use. APS-C sensors produce lower resolution, which can be an advantage for product-focused sessions: it's less demanding on storage and post-production, and it's more forgiving of minor skin or fabric imperfections.
Who do you need on a model photography support team?
Beyond the photographer and model, a professional session typically needs:
Hair and makeup, to keep the model's look consistent across every setup and look change.
A production manager or assistant, to keep the shot list, sequence, and schedule on track.
A stylist, to steam, pin, and adjust garments between shots.
Whatever the team size, make sure everyone knows the shot list and sequence in advance. A five-minute briefing at the start of the day prevents most of the delays that happen mid-shoot.
How do you prepare products for a model photography shoot?
The product needs the same attention as the model. Before each shot:
Steam or iron garments to remove travel and packaging creases.
Polish jewelry and dust glossy or reflective surfaces.
Use compressed air and a lint roller to clear dust and stray fibers.
Handle finished pieces with white gloves to avoid fingerprints.
Bring in a stylist for a final check before the model steps on set.
How do you edit model photography in post-production?
Five rules keep editing time down and results consistent:
Two minutes on set saves ten minutes in post. Fix what you can see through the viewfinder before you move on.
Stay true to the real garment and model. Over-editing color or shape increases the risk of returns when the product doesn't match its photos.
Control tonality and shadow depth while shooting, rather than trying to rebuild it afterward.
Avoid oversaturating color or pushing vibrance too far. It reads as artificial and can misrepresent the product's actual color.
Get a second, neutral opinion on color and tone before you publish, especially across a large batch of images.
How can you automate model photography at scale?
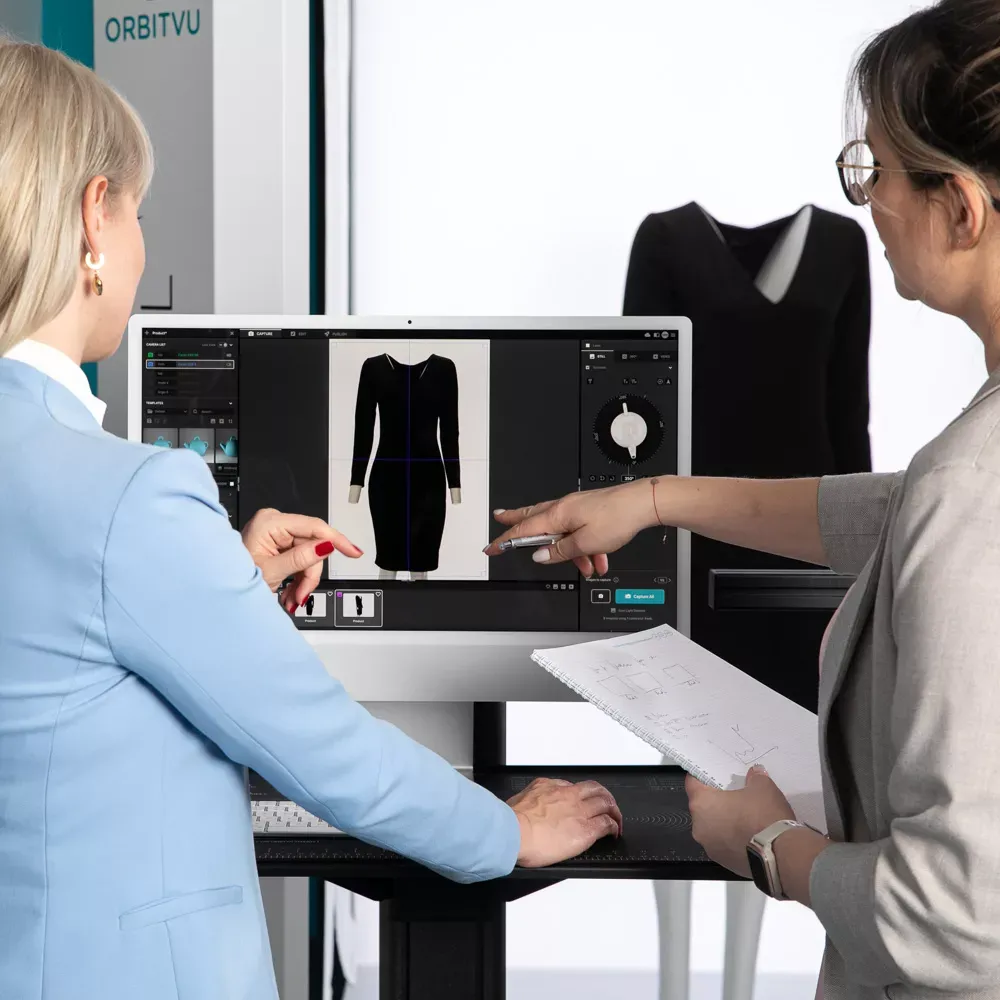
Manual model shoots don't scale well: every new SKU means booking a studio, a model, a stylist, and days of post-production. Orbitvu's Fashion Studio is built to keep the live-model workflow you already use, while removing the bottlenecks around it.
A software-controlled motorized stand and 14 individually controlled LED panels with a backlit back wall keep lighting consistent from the first shot to the last.
Automatic post-production and multi-destination publishing move images from capture to your sales channels without a separate editing pass for every shot.
One operator can capture, edit, and publish content for 150+ products a day, at seven images per product, all from custom templates that keep every session consistent.
Creative fashion product photography with Orbitvu Fashion Studio
Product photography quality has a direct line to revenue: 70% of online shoppers say product content quality can make or break a purchase decision, according to a 2023 Forbes/Bazaarvoice study. A faster, more consistent model photography workflow is one of the more direct ways to raise that quality without changing the product itself.
Frequently asked questions
What equipment do I need to photograph models?
At minimum, a camera and lens (a 50mm is a versatile starting point), a key light source (daylight, continuous, or flash), a reflector or fill light, and a backdrop. Add modifiers like diffusers or softboxes as your setup grows.
How far should I stand from a model when photographing?
Distance depends on your lens. With a 50mm lens, a comfortable working distance keeps body proportions natural. Longer lenses require standing farther back to avoid distorting the model.
What's the difference between lookbook and product-focused model photography?
Lookbook photography sells a mood, season, or collection through styling and setting. Product-focused model photography prioritizes showing a garment's construction, fit, and material, usually against a plain background for an e-commerce listing.
Can I use natural light for model photography?
Yes. Shoot away from direct overhead sun and use a diffuser to soften shadows on the model. Natural light works well for an editorial look, but it's harder to keep consistent across a large shoot than studio or automated lighting.
How can I speed up model photography editing?
Fix issues you can see in-camera, such as wrinkles, loose labels, or uneven exposure, before moving to the next shot. Automated capture systems like Fashion Studio also cut editing time by applying consistent lighting and templates at the point of capture.
This article was originally published in May 2021 and was optimized with AI technology in September 2026 for better comprehension.
Talk to Orbitvu about your workflow
Use the form to tell us what you are planning and what kind of product content workflow you need.
What tethering software actually does, how wired and wireless compare in 2026, the five categories of tools on the market, and how to choose one for a high-volume product photography studio.
A complete guide to 360 degree product photography. Get info and tips on 360 spin product photography, 360 product photography equipment, and software.
Since August 2, 2026, the EU AI Act requires a disclosure label on AI-generated and AI-changed images that could pass as real. Here is what counts, what is exempt, and what a product photography team should do about it.